![]()
![]()
Advertisement
| Constructor | Description |
|---|---|
| public Button() | Creates a button with no text on it. |
| public Button(String text) | Creates a button with a text on it. |
| Methods | Description | public void setText(String text) | Sets a String message on the Button. |
|---|---|
| public String getText() | Gets a String message of Button. |
| public void setLabel() | Sets a String text on button. |
| public String getLabel() | Gets the String text of this button. |
import javax.swing.*;
import java.awt.*;
import java.awt.event.*;

public class ButtonEx1
{
Frame jf;
Button button1, button2, button3;

ButtonEx1()
{
jf= new JFrame("Frame displaying buttons");
button1= new Button();
button2= new Button("Click here");
button3= new Button();

button3.setLabel("Button3");

jf.add(button1);
jf.add(button2);
jf.add(button3);

jf.setLayout(new FlowLayout());
jf.setSize(300,100);
jf.setVisible(true);
}

public static void main(String... ar)
{
new ButtonEx1();
}

}
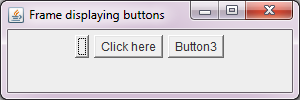 Figure 1
 Advertisement
import javax.swing.*;
import java.awt.*;
import java.awt.event.*;


public class ButtonEx2 implements ActionListener
{
Frame jf;
Button button1, button2;
Label label;


ButtonEx2()
{
jf= new Frame("Button click events");
button1= new Button("Yes");
button2= new Button("No");
label = new Label();

jf.add(button1);
jf.add(button2);
jf.add(label);

button1.addActionListener(this);
button2.addActionListener(this);

jf.setLayout(new FlowLayout(FlowLayout.CENTER,60,10));
jf.setSize(250,150);
jf.setVisible(true);
}


public void actionPerformed(ActionEvent ae)
{
if(ae.getActionCommand().equals("Yes"))
{
label.setText("You've clicked Yes");
jf.add(label);
jf.setVisible(true);
}

if(ae.getActionCommand().equals("No"))
{
label.setText("You've clicked No");
jf.add(label);
jf.setVisible(true);
}
}

public static void main(String... ar)
{
new ButtonEx2();
}

}
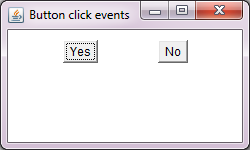 Figure 2
  Figure 3


Advertisement
Please subscribe to our social media channels for daily updates.
Advertisement
Please check our latest addition
C#, PYTHON and DJANGO
Advertisement
© Copyright 2020 Decodejava.com. All Rights Reserved.